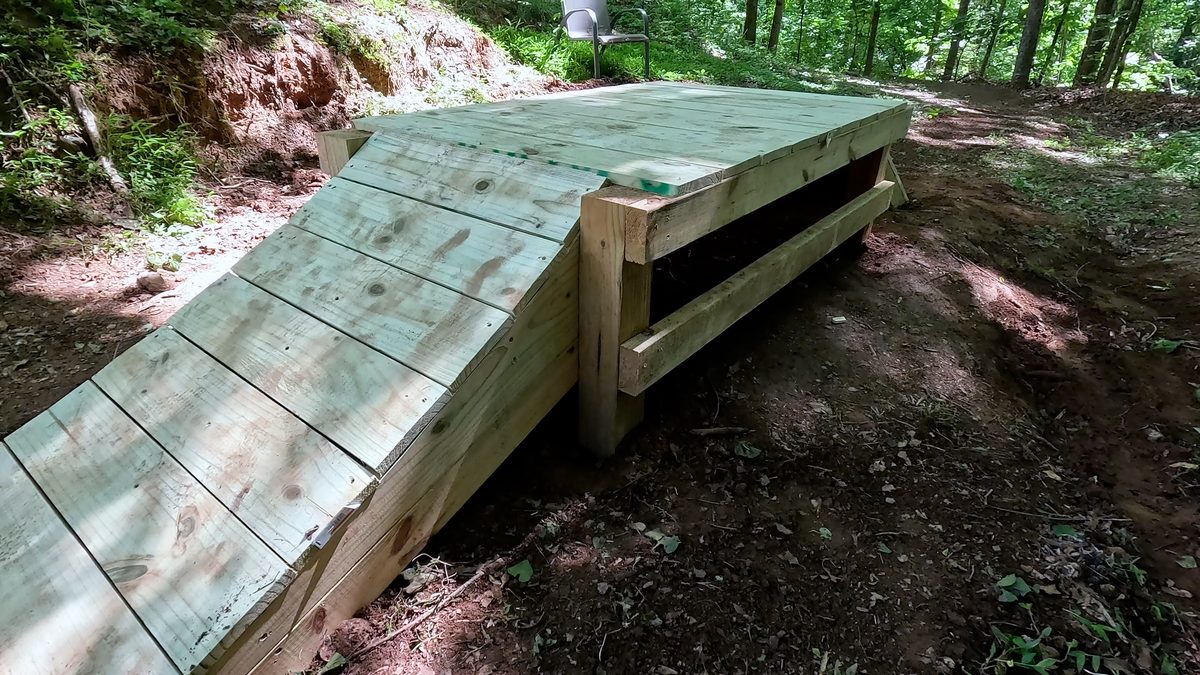
If you've got kids who are into biking, building jumps together is a great way to spend time together. Not only do they get to learn how to use real tools, the end result is something they’ll love using for a long time. A few months ago we built some kicker ramps and the kids absolutely loved them, so last weekend we decided to level things up with a wooden tabletop jump.
A tabletop is a great beginner to intermediate jump design. The flat top means if you don't have enough speed to clear it, you just roll across the top instead of casing the landing. This is much more forgiving than a gap jump, and is great for younger kids. Meanwhile, older kids can work on clearing the jump completely.
Here's how to build one yourself. Please note: I’ve made a few changes to the instructions below from what you’ll see in the video based on what we learned the hard way.
Use pressure-treated lumber throughout. This thing is going to live outside in the dirt and weather, and untreated wood will rot faster.
Start by cutting your 4x4x8 into four 2-foot legs. These are what the whole structure sits on.

From your 2x4x8 stock, cut six pieces at 33 inches and six pieces at 5 feet. The 5-foot pieces run the length of the table; the 33-inch pieces connect the front and back.

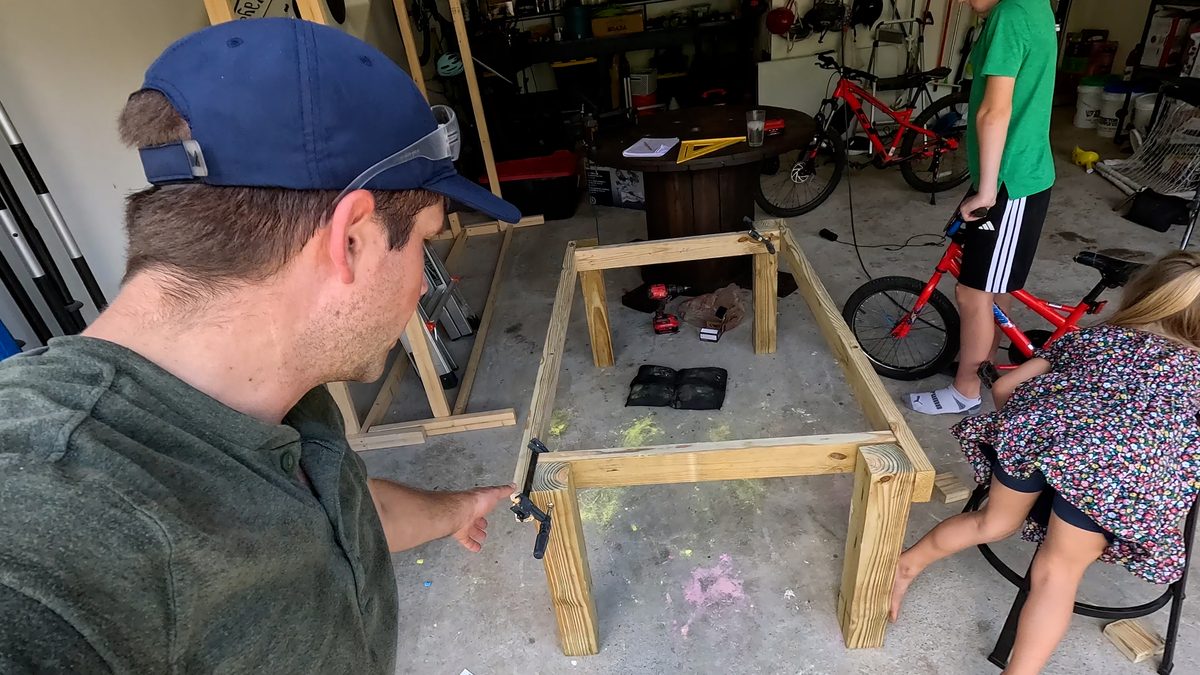
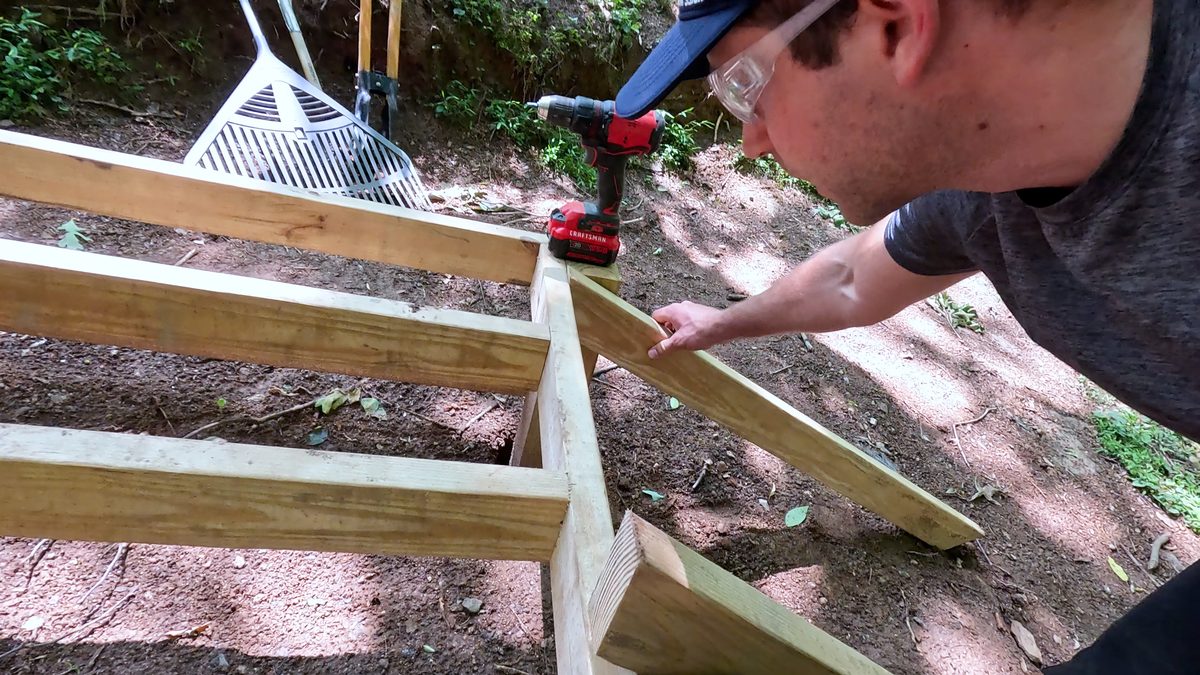
To build each side of the table frame, screw a 5-foot 2x4 flush to the top of two legs, with the 2x4 on the outside of the legs. Then measure 6 inches down from the bottom of that top board and add a second 5-foot 2x4 parallel to it for lateral stability. Build the second side the same way.

Stand both sides up and connect them with the 33-inch 2x4 cross pieces to complete the rectangular frame. The short cross pieces should run on the inside of the 4x4 legs. Check that everything is square before screwing off.
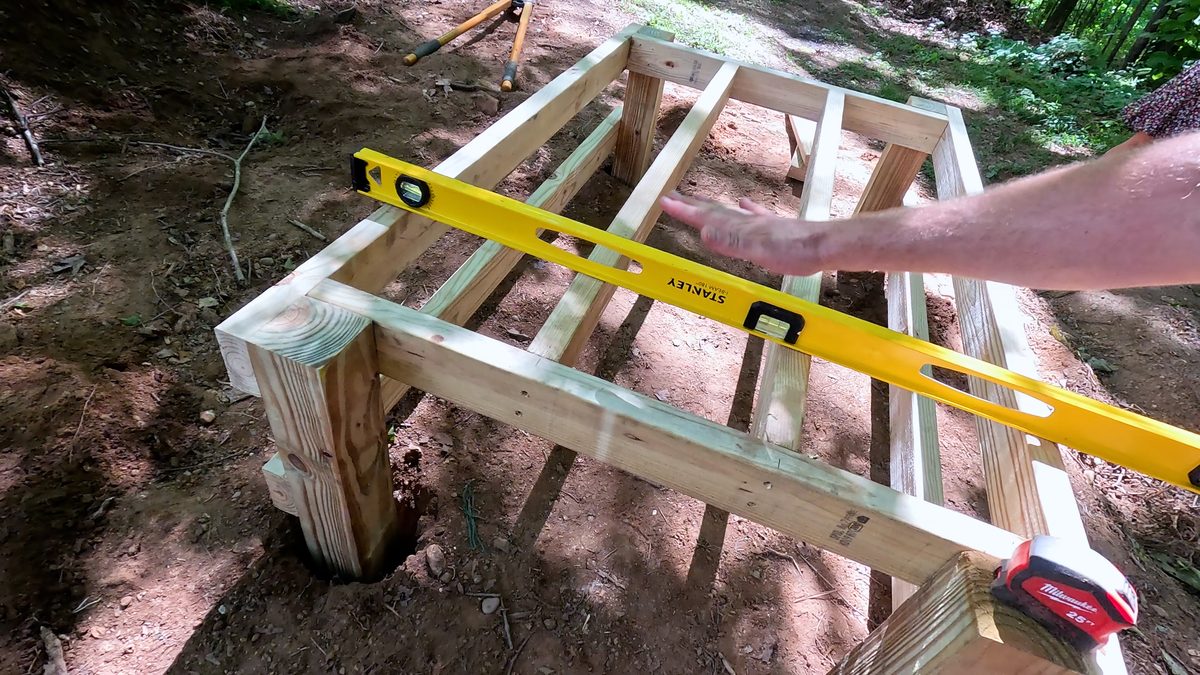
Measure the inside length of your table frame and cut two joists using 2x4s to fit. In our case, these ended up being 49 ¾” long. Now attach them to the top of your frame. These will help support the decking.

Once the frame is assembled, position it where you want the jump to live and dig each leg a few inches into the ground for stability. This keeps it from shifting when riders hit it.
Take your 2x8x12 and cut it into three 4-foot sections. These become the support rails of your up-ramp.
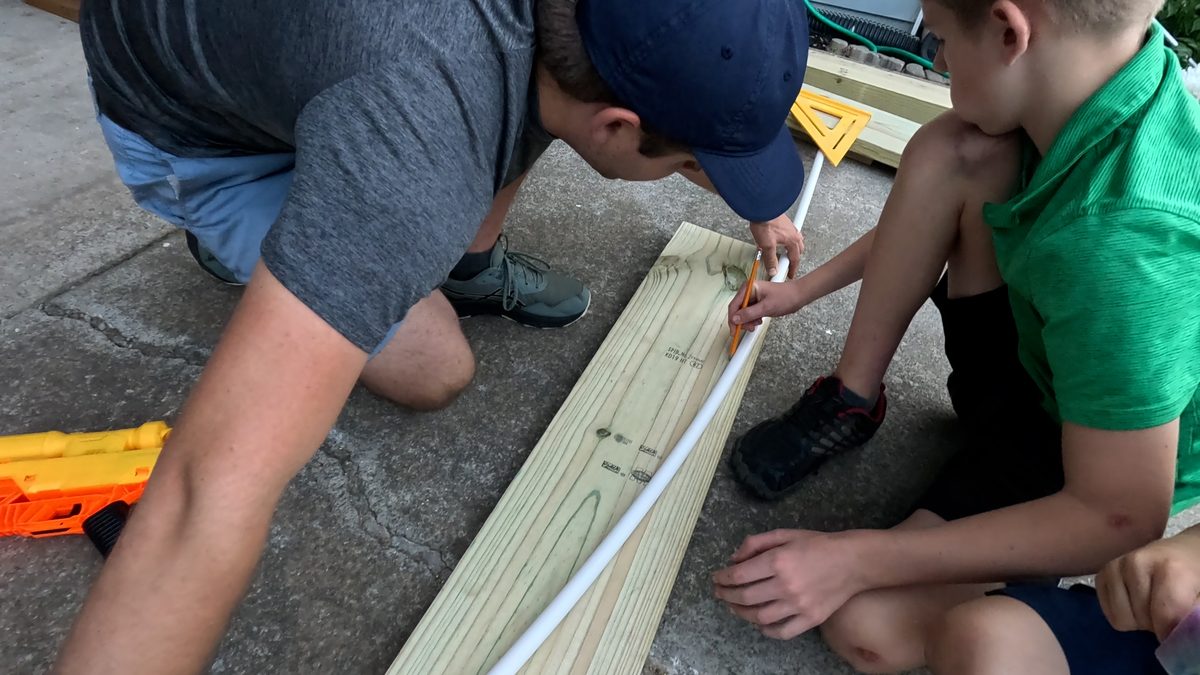
To get a smooth curved ramp, use a length of PVC pipe as a flexible guide. Bend it to the curve you want, trace it onto the first 2x8 section, and cut it out. Use that first piece as a template to trace and cut the second and third so they match.
Trim the bottom end of each ramp board so it sits flush against the angle of your table frame. Then cut matching 2x4 pieces the same length as the ramp boards and place them directly underneath for added strength. Screw these into the table frame.

(NOTE: This is a bit different (and better) than the video. You won’t need cross pieces between the three up-ramp rails).
Measure and cut three 2x4s so they extend from the exit edge of the table frame down to the ground at roughly 30 degrees. These are the legs that support your landing ramp. Screw each one to the top of the frame.
Cut your decking boards to 3 feet wide for the table surface. Work your way across the frame, screwing each board down with 1-5/8" screws and leaving a roughly 1/4-inch gap between boards for drainage. You'll likely need to trim the top board on both the up-ramp and down-ramp to get a clean fit where they meet the table.

Start by rolling over it slowly at low speed to get a feel for the transition. Build speed gradually as confidence grows. The flat tabletop top is forgiving if you're short on speed, so there's room to work up to it.
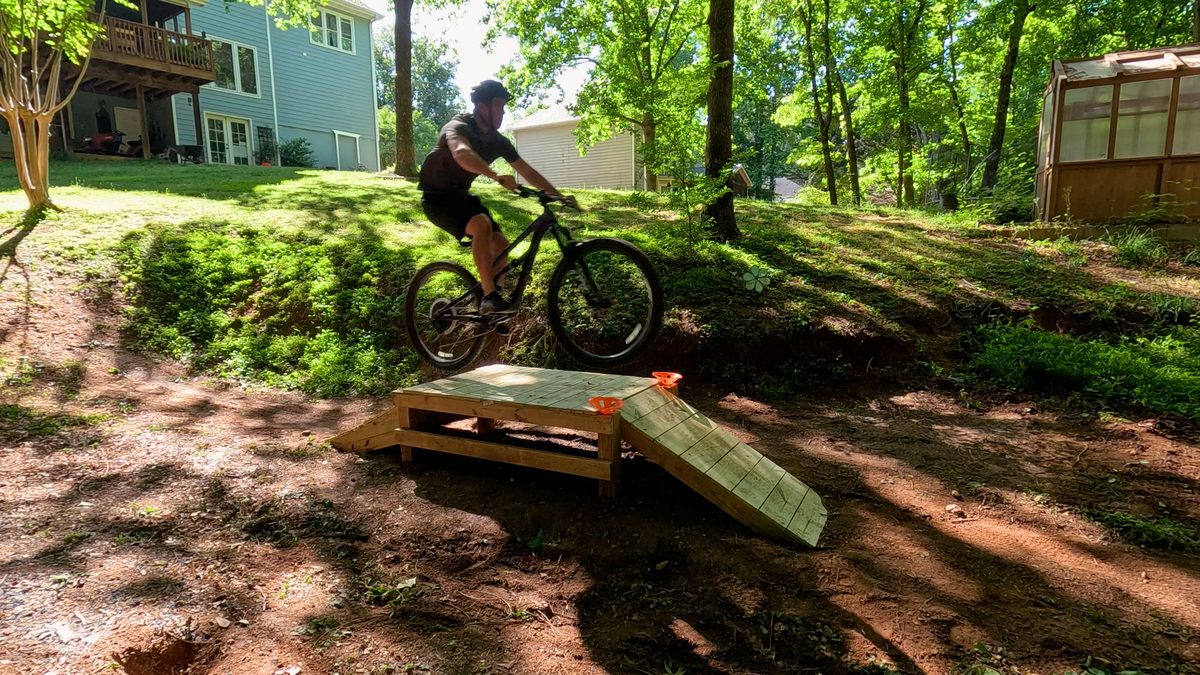
Wear a helmet. Every time, no exceptions. Make sure the ground around the ramp is soft dirt rather than hard pack or concrete. Line up your approach carefully before committing to speed, and make sure you're centered on the ramp. We added orange cones above the down-ramp as a visual cue to help riders stay on line during the approach. Use them or something similar, especially for younger kids still dialing in their aim.

Build and ride at your own risk. This is a real jump and deserves real respect.
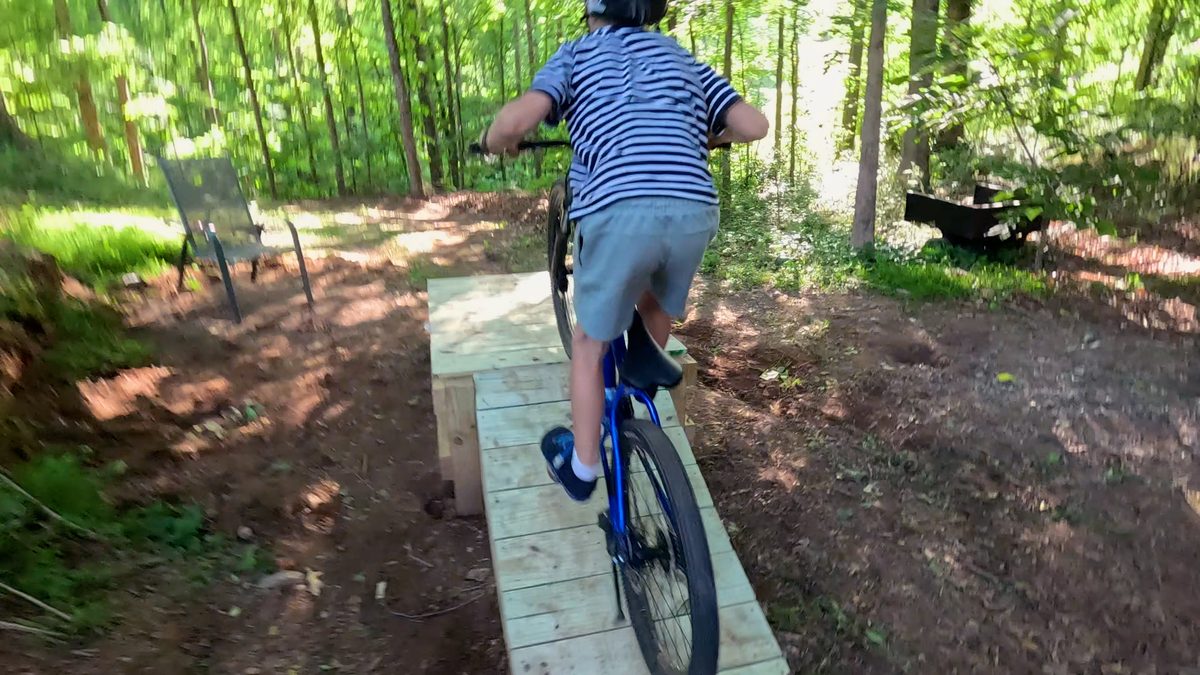
We built our ramp over a few days, but I’d guess the total build time was about 4 hours once we had all the supplies ready to go. This ramp has become one part of a backyard mountain bike loop we’re working on, which has been a great project to get the kids outside digging and building.
If your kids are getting into biking and you want more backyard projects to fuel it, check out our DIY kicker bike ramp build too. Different style, same idea: build something together and then go ride it into the ground.
Enjoy!
